Homemade Conditioner For Dogs: Easy DIY Recipes for Healthy Dog Hair
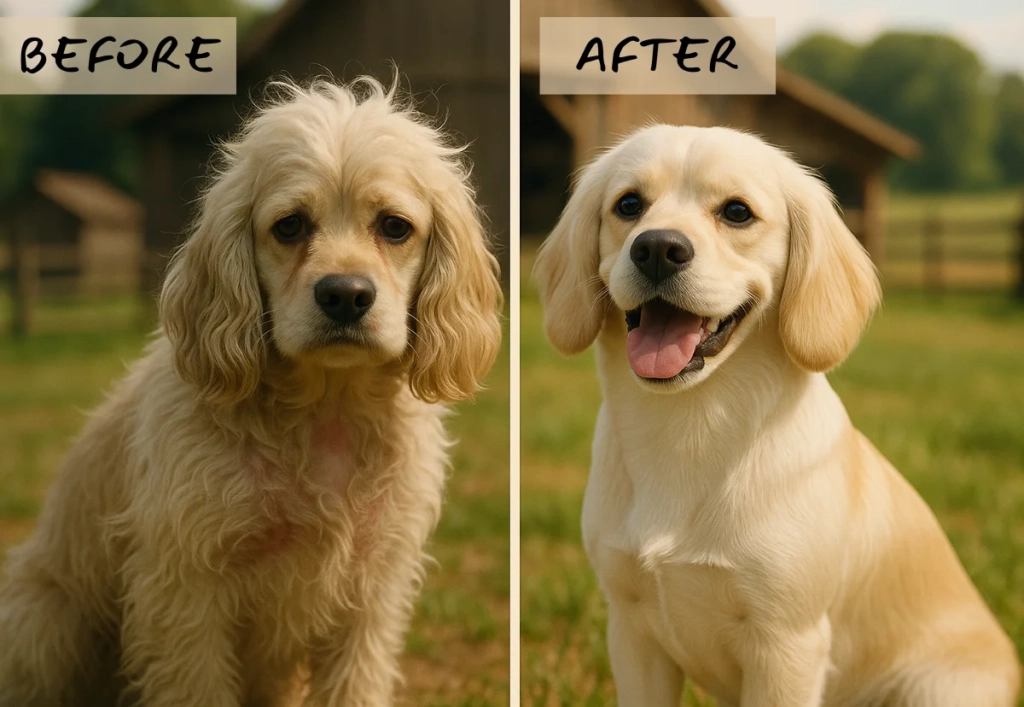
When I first tried making a homemade conditioner for dogs, I wasn’t sure what to expect. She had just finished rolling through a patch of hay, and her coat looked dull and tangled. I mixed up a simple recipe with ingredients from my kitchen, gave her a rinse, and to my surprise, her fur dried soft, shiny, and easier to brush.
Many dog owners share the same concern I had: commercial conditioners often come with a long list of chemicals we can’t even pronounce. That’s why more people are turning to natural, safe alternatives.
In this guide, I’ll share DIY dog conditioner recipes, step-by-step instructions, and lessons I’ve learned from life on the farm with Rumi.
Why Use a Homemade Conditioner For Dogs?
A homemade dog conditioner is often safer and gentler than store-bought options. That’s the simple truth.
As a vet assistant, I talk with many dog owners who worry about the long lists of ingredients on commercial labels. Their concerns are valid. Many conditioners on the market include sulfates, parabens, or heavy perfumes. These might smell pleasant to us, but they can irritate your dog’s skin and strip away natural oils that keep the coat healthy. When you make a conditioner at home, you know exactly what touches your pup’s skin.
Here’s why it matters:
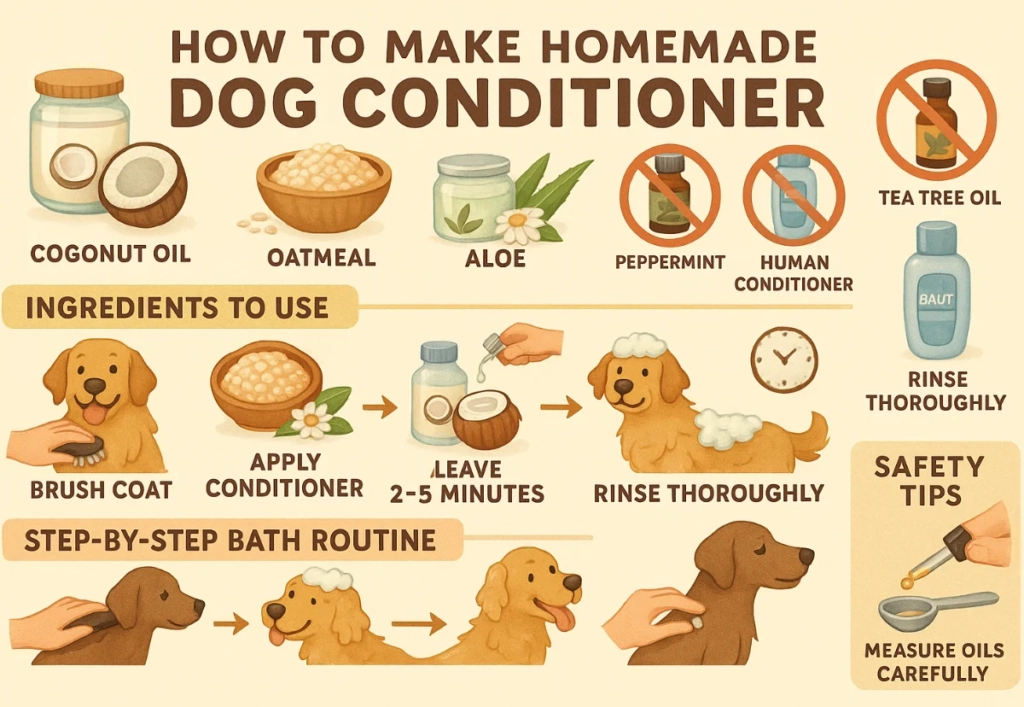
- Natural and safe ingredients. Most DIY recipes use simple items like coconut oil, aloe vera, or oatmeal. These calm irritants support skin health without harsh side effects.
- Budget-friendly care. You probably already have most of the ingredients in your pantry. That means you can create a fresh batch anytime for just a fraction of what you’d spend at the pet store.
- Tailored for your dog. Every dog has unique needs. If your pup struggles with dry, itchy patches, you can add chamomile or oatmeal for extra relief. If you want more shine, a touch of olive or coconut oil works wonders.
A few days ago, I saw how powerful this can be. At the farm, one of our senior dogs, Duke, had a terrible reaction to a perfumed store-bought conditioner. His skin turned red, and he scratched for days. We tried a simple oatmeal-based recipe instead. Within two baths, his irritation eased, and his coat started to look soft and glossy again.
That experience taught me something important. Making your own dog conditioner is more than just a natural alternative. It gives you peace of mind and strengthens the bond you share with your dog. Bath time becomes less about getting it over with and more about giving your pup the gentle care they deserve.
What to Avoid in DIY Dog Conditioners
Not every natural ingredient is safe for dogs. That is the most important thing to remember when making a homemade conditioner. Some household items that seem gentle to us can actually irritate a dog’s skin or even make them sick.
Unsafe Essential Oils
Many owners assume essential oils are harmless because they are plant-based. The truth is very different. Oils like tea tree, eucalyptus, and peppermint can be toxic to dogs even in small amounts. What smells refreshing to us can overwhelm a dog’s sensitive system. I have seen pups come in with redness and restlessness after exposure to these oils, and it is not worth the risk.
Vinegar in High Concentration
Apple cider vinegar sometimes gets recommended for its antibacterial benefits, but using too much can backfire. Strong vinegar solutions can sting and dry out the skin. If your dog already has irritation, vinegar can make it worse. Dilution is key, and even then, it is better used sparingly.
Human Hair Products
This is one of the biggest mistakes I see. Human shampoos and conditioners are made for our skin, not for dogs. They often contain perfumes, sulfates, and silicones that upset the natural balance of a dog’s coat. Dogs have more alkaline skin than we do, which means human products strip away protective oils. The result is brittle fur, dryness, and sometimes itching that lingers for days.
A Very Personal Fault
I learned this firsthand with Rumi. Before I had proper training, I used a human leave-in conditioner on her coat after a bath. I thought I was helping, but within hours, she was scratching nonstop. Her skin turned red, and she looked so uncomfortable that my heart sank. It was a hard lesson, but it showed me how vital it is to respect the unique needs of a dog’s skin.
Making your own dog conditioner is a wonderful choice, but it only works if you use safe ingredients. By avoiding harmful oils, strong vinegar solutions, and human hair products, you protect your pup’s skin and coat. A homemade recipe should feel as safe and soothing as a hug, not something that leaves your dog in discomfort.
Step-by-Step DIY Dog Conditioner Recipes
Making a homemade dog conditioner doesn’t have to be complicated. With a few safe, natural ingredients, you can keep your pup’s coat soft, shiny, and itch-free. Below are four tried-and-true recipes we always use at the farm. Each one is gentle, effective, and very easy to whip up at home.
1. Simple 2-Ingredient Homemade Dog Conditioner
Ingredients:
- ½ cup pure aloe vera gel (no added dyes or alcohol)
- 1 cup distilled water
Instructions:
- Combine aloe vera gel and water in a clean spray bottle.
- Shake well before each use.
- After bathing your dog, lightly spritz the mixture onto their coat.
- Gently brush through to distribute.
This recipe was my go-to during Rumi’s puppy days when her coat was extra delicate. The aloe added softness without overwhelming her skin, and the spray bottle made it quick and mess-free.
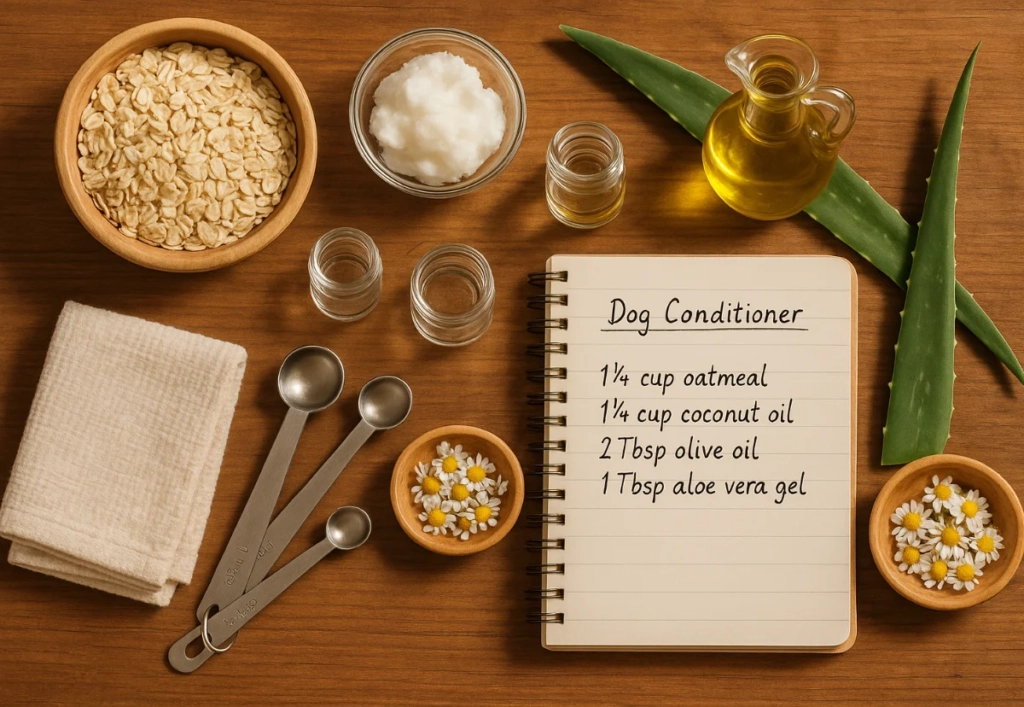
2. DIY Oatmeal Dog Hair Conditioner
Ingredients:
- ½ cup finely ground oatmeal
- 2 cups warm water
- 1 tablespoon coconut oil (melted)
Instructions:
- Mix ground oatmeal with warm water until it forms a milky consistency.
- Stir in the melted coconut oil.
- After shampooing, massage the mixture into your dog’s coat.
- Leave on for 5 minutes, then rinse thoroughly.
We use this blend often on farm dogs with itchy or irritated skin. One shepherd mix had hot spots that looked miserable; after a few oatmeal soaks, he finally stopped scratching and settled comfortably.
3. Leave-In Homemade Dog Hair Conditioner
Ingredients:
- 1 tablespoon apple cider vinegar (well-diluted)
- 1 teaspoon coconut oil
- 2 cups water
Instructions:
- Add all ingredients to a spray bottle.
- Shake well before each use.
- Lightly mist your dog’s coat after a bath or in between washes.
- Do not rinse; just brush through gently.
This one adds shine and helps with tangles. Just remember, a little goes a long way! I once got overzealous with Rumi’s coat and sprayed too much… let’s just say she smelled like a salad bar for hours.
4. Shea Butter Deep Conditioner for Dogs
Ingredients:
- 2 tablespoons shea butter
- 1 tablespoon olive oil
- 2 tablespoons pure aloe vera gel
Instructions:
- Gently melt the shea butter until soft.
- Blend in olive oil and aloe until smooth.
- Massage into your dog’s coat after shampooing.
- Rinse thoroughly to avoid residue.
This is a richer treatment, perfect for dry or long-haired breeds. One of our farm collies looked like a show dog after her first shea butter treatment; her coat flowed in the breeze like she’d just left a grooming salon.
How to Apply DIY Dog Conditioner the Right Way
You should apply DIY dog conditioner right after shampooing, massage it gently into your dog’s coat and skin, leave it on for 3–5 minutes, then rinse thoroughly with lukewarm water and towel dry. Here are the easy and detailed 5 steps :
Step 1: Start with a Good Brush
Before you even turn on the water, take a few minutes to brush your dog’s coat. This clears away loose hair and tangles, making the bath easier and allowing the conditioner to reach the skin evenly. Dogs often enjoy this step too, and it sets a calm tone for the bath.
Step 2: Wash with a Gentle Shampoo
Always use a shampoo designed for dogs. Human shampoos can upset their natural skin balance and cause dryness. A mild, dog-safe shampoo cleans the coat without stripping away protective oils. Once your pup is lathered and rinsed, you are ready for the conditioner.
Step 3: Apply Conditioner with Care
Work the conditioner into your dog’s coat using your hands. Massage it in gently, especially around dry spots or areas that tangle easily, like behind the ears, under the belly, and near the tail. This not only spreads the product but also feels comforting to your dog.
Step 4: Let It Sit a Moment
Give the conditioner a few minutes to do its job. Two to five minutes is usually enough for the nourishing ingredients to soak in. Use this time to reassure your dog with gentle strokes or calm words so they stay relaxed.
Step 5: Rinse Thoroughly
This step is more important than many people realise. Leftover conditioner can cause itching, flaking, or even a dull coat. Take your time and rinse until the water runs clear. Pay extra attention to thick fur around the neck and hindquarters, where residue often hides.
Bathing with a homemade conditioner should feel like a little act of love, not a chore. When you brush first, wash gently, massage the conditioner in, give it time to work, and rinse completely, your dog walks away clean, comfortable, and cared for.
Safety Tips and Common Mistakes
When making a homemade dog conditioner, safety should always be the first priority. Natural ingredients can still cause unexpected reactions, so it is important to be cautious. A common mistake is using too much oil. While coconut or olive oil can add a lovely shine, an excess leaves the coat greasy and heavy, attracting dirt instead of keeping it clean. Less truly goes a long way.
Another step many owners skip is the patch test. It takes only a minute to apply a small amount to one area of fur, but it can prevent a full-body reaction. Dogs, like people, respond differently to even the gentlest ingredients.
At the farm, we once tried a new recipe on one of our hounds, and within minutes, the patch of skin turned red. Because we had tested first, we avoided causing him real discomfort. Unsafe ingredients are another pitfall. Essential oils such as tea tree, peppermint, or eucalyptus may smell fresh, but can be toxic.
Human conditioners are no better, as they upset the natural pH of canine skin and lead to dryness or irritation. A homemade conditioner should always bring comfort. With safe choices and a little care, bath time stays soothing and gentle.
Last Word
Bath time with Rumi is still a splashy, wet adventure; my bathroom never quite survives, but thanks to these homemade dog conditioners, her coat shines, and she’s much more comfortable afterwards. What began as trial and error on the farm has turned into a routine I actually look forward to, and Rumi does too, most days.
I encourage you to try one recipe this week. You might be surprised at how simple and effective it can be for your pup. If you have a favourite DIY dog conditioner blend or a question about getting started, I’d love to hear your experience. Share it with me!
FAQs About Homemade Conditioner For Dogs
How often should I condition my dog’s coat?
Most dogs benefit from conditioning after every bath, which is usually every 2–4 weeks. Over-conditioning isn’t necessary unless your dog has an especially dry coat or skin condition.
What is the best DIY conditioner for dogs with sensitive skin?
An oatmeal and aloe mix is gentle, soothing, and ideal for pups with allergies or dry patches. Many of our farm dogs with itchy skin respond well to this simple blend.
Does homemade dog conditioner work on all breeds?
Yes, but you may need to adjust the recipe. For short-haired breeds, lighter sprays like aloe + water are best. For long-haired dogs, richer blends like shea butter or coconut oil can help prevent tangles.
Can DIY conditioners replace brushing?
No. Conditioning and brushing serve different purposes. A homemade dog hair conditioner adds moisture and softness, while brushing removes tangles, dirt, and loose fur. Together, they keep your pup’s coat in top shape.